Thoughts & news

Russ Little Russ Little

Adventures in itajime shibori

Adventures in what?

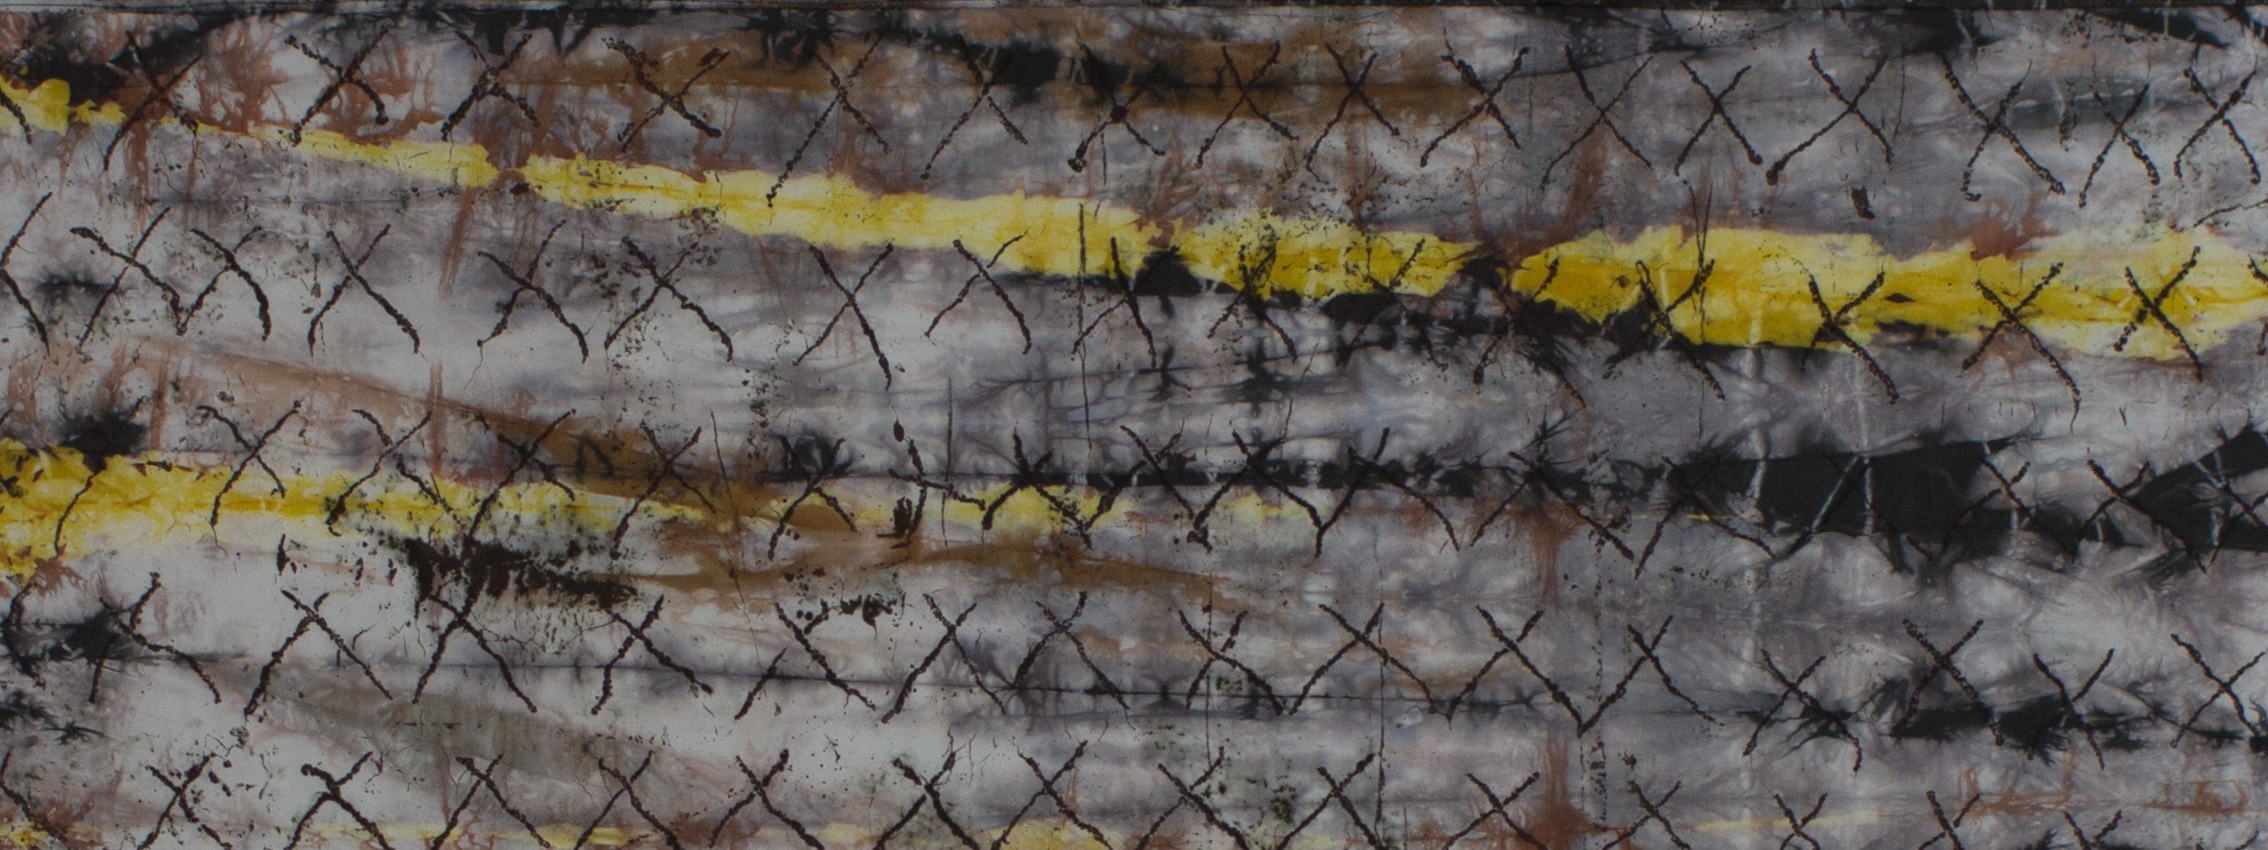
From the same folks that gave the world sushi and origami comes the equally OCD collection of dye patterning techniques collectively known as shibori (she-BOO-ree). All of these methods involve creating a physical resist between cloth and a dye bath by folding, clamping, wrapping, stitching, and binding. I've been using arashi (ah-RAH-she)--pole wrapping--for several years and getting some satisfying results.

An example of the type of patterning produced by arashi shibori

An example of the type of patterning produced by arashi shibori

I've also been experimenting with itajime (it-ah-JEE-may), another form of shibori that involves clamping folded cloth between wood or plexiglass forms to create a resist. With all of these techniques you get out what you put in. In the case of itajime, carefully folding and pressing the fabric is a time-consuming process, but ultimately produces better (or at least or regular geometric) results than loosely folded fabric.

Itajime scarves drying on the line

Itajime scarves drying on the line

And, for your further entertainment, here's a video that compresses the somewhat fussy process of folding and pressing a 2 yard piece of cloth into a small triangular stack. In this video and the image above I'm working with cotton lawn.

Read More
Russ Little Russ Little

Tuesday morning clothesline

I was in the studio at 6 AM this morning (before work) washing out the dye from Sunday and Monday. Last night, all of Sunday's wax and print work got a nice over-dye. I left 12 yards of cloth drying on the line today while I'm at work so they'll be ready for me when I get home. Tonight I get to press out all of the wax (ironing between mountains of newspaper) and launder out the residue. This is about my least favorite task, but it's the only way forward it I want to apply more color. It's that Karate Kid thing--wax on; wax off.

The clothesline as I left for work.

The clothesline as I left for work.


Read More
Russ Little Russ Little

Let the season of making begin

I'm busy in the studio all year, but over the past 5 years or so I've fallen into an annual pattern of activity. January through April is usually a time for research and developing new ideas--and the time for a much needed winter vacation. May is usually the time that I'll fit in a workshop if I can. June through September I'm often working on art with an eye toward summer and fall exhibition deadlines. But, it's in October through December that the activity level really ratchets up. I sell wearable art (mostly scarves) online all year long, but I also do one 2-day craft show at the beginning of December. Producing enough work for 2 days of selling and working a full time job takes months of part-time effort. 

And as I write this, I've got several yards of printed fabric downstairs in the studio batching--oh, yeah, and dye-stained hands. I absolutely love this frenzy of dyeing, printing, and sewing, but I'll be exhausted by Christmas. That's just the way it is. 

Here are some photos of just some of the weekend's activities. Many thanks to Dan, my in-house photographer.  

Adding soy wax resist to silk crepe de chine using an Indonesian tjap. The wax will block whatever color I add next. 

Adding soy wax resist to silk crepe de chine using an Indonesian tjap. The wax will block whatever color I add next. 

Inking a large sheet of plexiglass with thickened dye for monotype printing.

Inking a large sheet of plexiglass with thickened dye for monotype printing.

Creating pattern on the monotype plate.

Creating pattern on the monotype plate.

Printing the waxed cloth on inked plate.

Printing the waxed cloth on inked plate.

Pulling the print.

Pulling the print.

The next steps will be letting the dye cure then putting the whole thing in an immersion dye bath. After that I'm not sure--probably removing the wax followed by...whatever it needs.  

Read More
Russ Little Russ Little

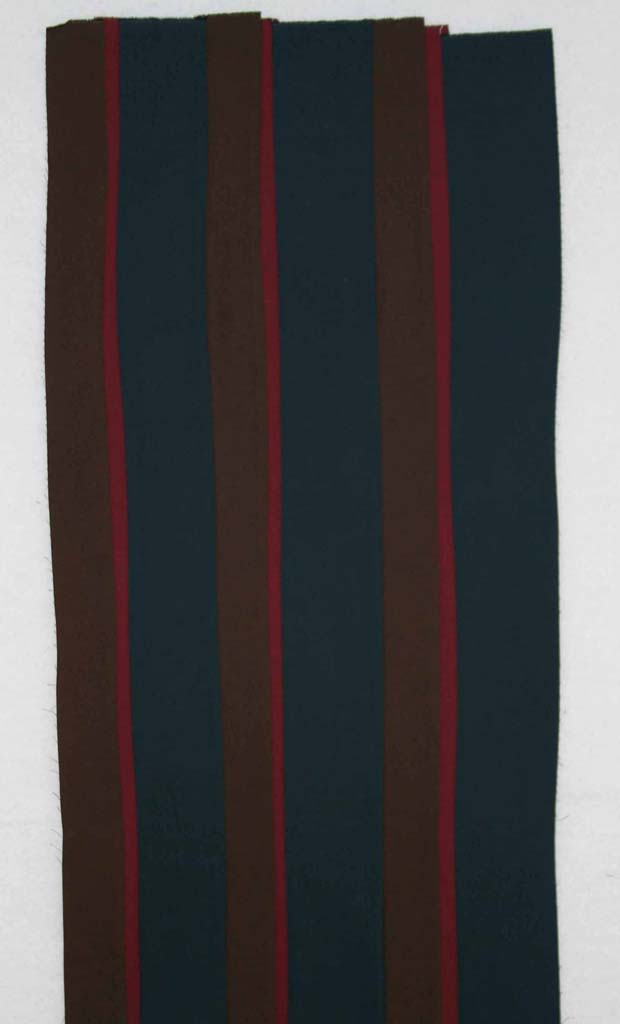
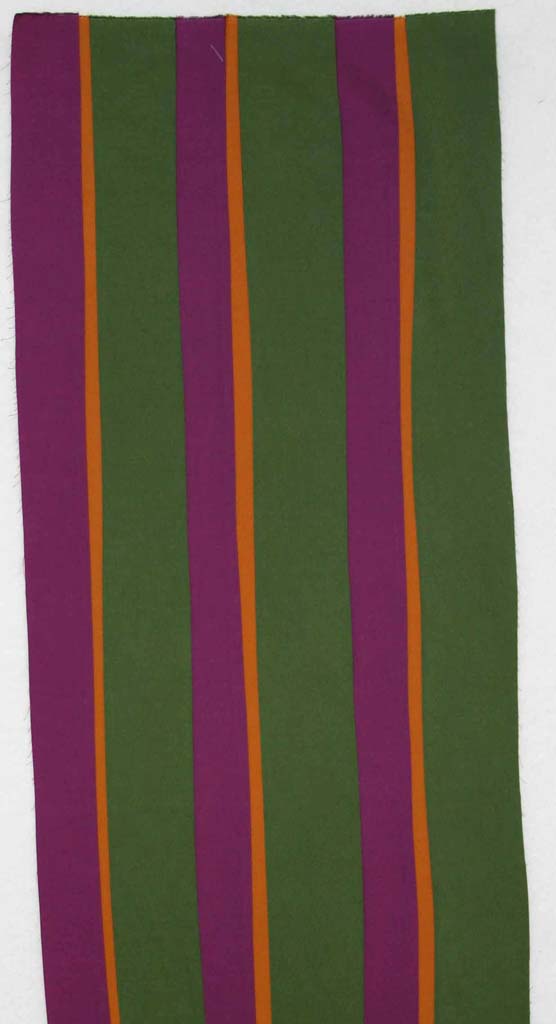
Lessons from my 365: Not every design is a winner

Well, doesn't this seem like a good place to start as I consider what lessons I might learn or re-learn from my recently completed "365 Patterns" project? Just because I put pen to paper, brush to canvas, or press the shutter release button on a camera doesn't mean the result is going to be a great work. Consider the following two images. I probably spent about the same amount of time on each, but the one on the left clearly has color issues and just isn't anything too special. The on the right is better: more depth, better positive/negative space relationships, and just generally more engaging.

So, what's to be learned from this confession? I think it's these thoughts:

  • Do prepare to work by taking a few minutes to clear your mind and settle your body. This is my single biggest challenge.
  • Do practice, and in doing so, sometimes work rapidly.
  • Do balance rapid work with slower and more contemplative work. 
  • Don't become overly invested in the result before the process has even begun. "I will now create a successful work of art?" is a burdensome point of beginning at best, and more often than not the first step on the road to disaster.
  • Don't loose sight of the fact that at some point there's greater value in working--regardless of the outcome--than in merely contemplating the work. Spend time with your thoughts, then get out of your head and do something. 
  • Do value the learning that comes from making mistakes and doing work that turns out to be less than expected.


Read More
Art, News Russ Art, News Russ

Work in progress: new circles

Graphite and charcoal on cotton broadcloth; a mixture of texture rubbing and directing drawing.

Thickened liquid reactive dye; drawn and brushed.

Thickened liquid reactive dye; texture rubbing.

Read More
Art, News Russ Art, News Russ

Untitled work in progress

Not sure where this piece is going, but it's up on the design wall in studio incubating. The black line is pieces in. I've been thinking about line quality and trying to create pieced work that has a gestural quality to the line work. More to come...perhaps.


Read More
Art, News Russ Art, News Russ

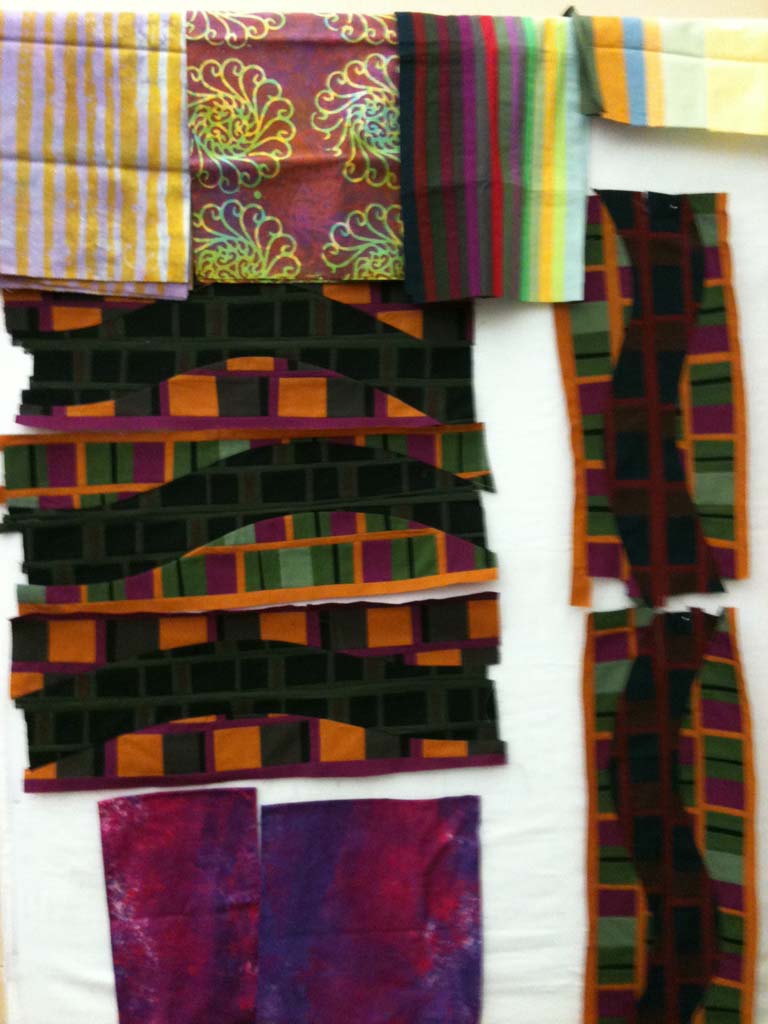
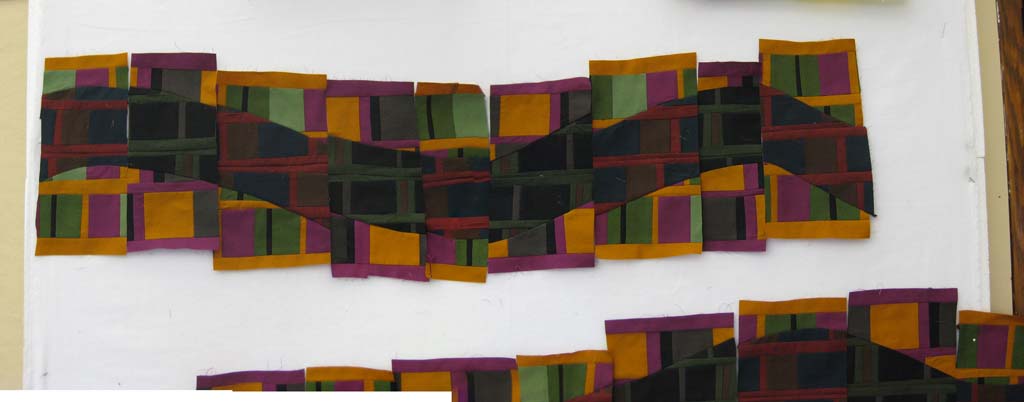
Saving the hopeless quilt: Part 4

Now for the final panel in this triptych.
The center panel was always different from the other two and in the end I felt that I needed to accentuate that difference rather than trying to suppress it. The answer I came up with was to go dark on the background rather than light, but keep the same pieced construction.

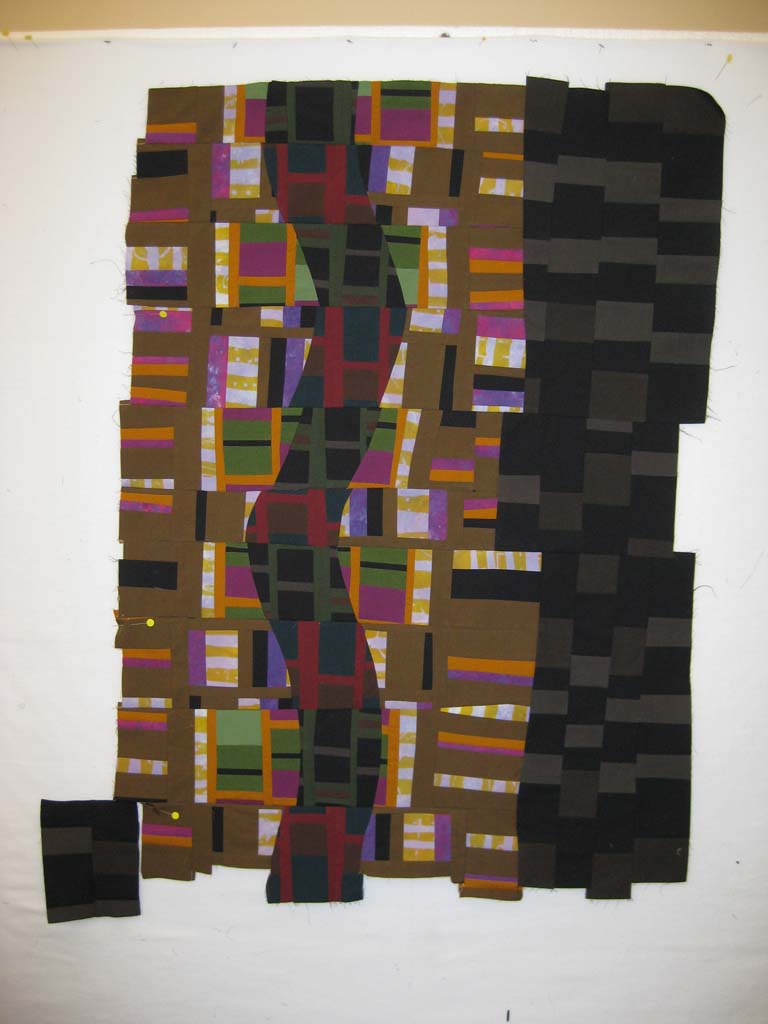
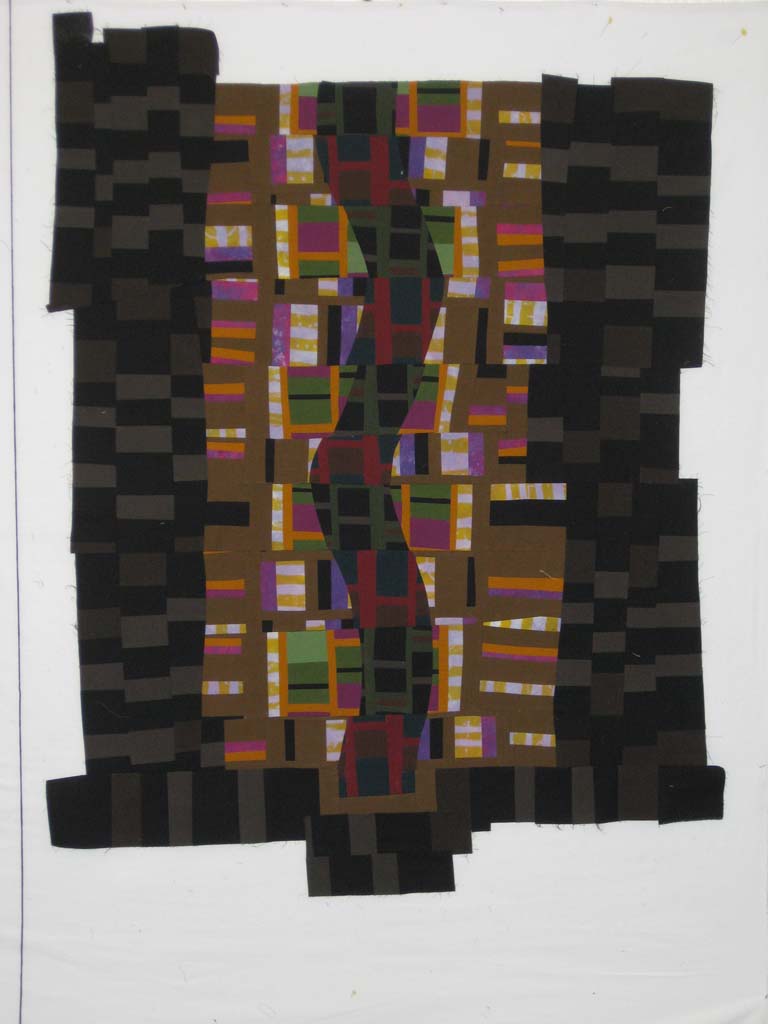
As I began to assemble it I realized that the little piece of the curved middle strip that was extending below the rest of the design was something to which I'd become attached. From the purely practical perspective of construction, this was not the best time to come to this realization because it meant even more seam ripping than I was already doing, not to mention scavenging through the scrap pile in search of bits of fabric that I was out of.

In this shot you can see how I managed to preserve that little bit at the bottom.
And finally, this is what the completed quilt top looks like cropped.
Now I just have to commit to doing the quilting to finish the three panels that make up the entire composition. I've already got an idea of where I want to show the finished work and the deadline is in early summer. I guess that's far enough away, but just close enough for me to feel a little sense of urgency.
Although this project isn't done yet, I think that I can say that I did learn from it. Don't through out those difficult pieces that you just can't seem to make work. Put them away, get some distance from whatever it was that was blocking or frustrating you, then pull them out and reconsider. Cut, paint, print, overdye--transform them into something that speaks. In this case I chose to transform the piece through restructuring alone. I was sorely tempted (especially in the beginning) to go the surface design route, but I think resisting paid off in greater learning and a better final product.
Read More
Art, News Russ Art, News Russ

Saving the hopeless quilt: Part 3

I can only sustain suspense for so long so here they are: 2 of what will be 3 panels.

I think they stand alone well and I think they are going to work well together when they are joined by the 3rd panel. I intend to keep them as separate quilted pieces of roughly the same size. They aren't a series in and of themselves, but they are part of a growing series of triptychs. Having created another piece that's close to 70 inches wide and struggled with the size and hanging issues, I thought it might be time to explore the idea of a single work in parts.
The middle panel is a variation on these two. I finished piecing it today, but you'll have to wait for another day to see the pictures.
Read More
Art, News Russ Art, News Russ

Saving the hopeless quilt: Part 2

Picking up where I left off with the last post...

I was able to piece together 2 curving lines in the same color combinations then spent some time looking at them on the design wall in a horizontal orientation. I felt good about where it was going, but I figured out early on that I wanted to rotate it to vertical. I also knew that I didn't have enough pieces to work with to create any sort of real composition. At the very least I needed another element--a 3rd line.
It also needed some variation. The center line below is built from the same original strip sets as the other two, with another one worked in. Here I aslo introduced other printed fabrics that related to colors in other parts of the composition.
There's a sort of rhythm, undulation to this that I like.

Checking the values with a grayscale photo (below) helped me workout some figure-ground problems. But, looking at this photo I realized that needed something else. I struggled to figure out how the join these 3 pieces into a whole. I considered several options for filling in the spaces between the irregularly shaped columns. In this photo you can see a trial strip between the 2nd and 3rd columns. It seemed like the start of something, but there were value and scale issues.

The question that I struggled with was how to unite these three columns in a way that maintained the three distinct entities in the final composition--not just the curved lines but the background of each line.
Over time I began to feel like that I needed to treat these three lines as distinct objects and not try to unite then, but rather to transition between them. I needed to interrupt the vertical flow with some horizontal lines. After a lot of rearranging and discussion with friends I started to assemble the first column.
The more I fiddled, the further the three lines move apart and asserted themselves as individuals. So I changed my approach. I would "unify" the whole quilt with a common light background.
It's a little hard to see here, but the background that's starting to come together is pieced from strip sets that were all white, or slightly red or yellow. There are also occasional bits of brown. The plan was to build the quilt from left to right.
Maybe you can figure out what comes next...and maybe you can't. More to come.
Read More
Art, News Russ Art, News Russ

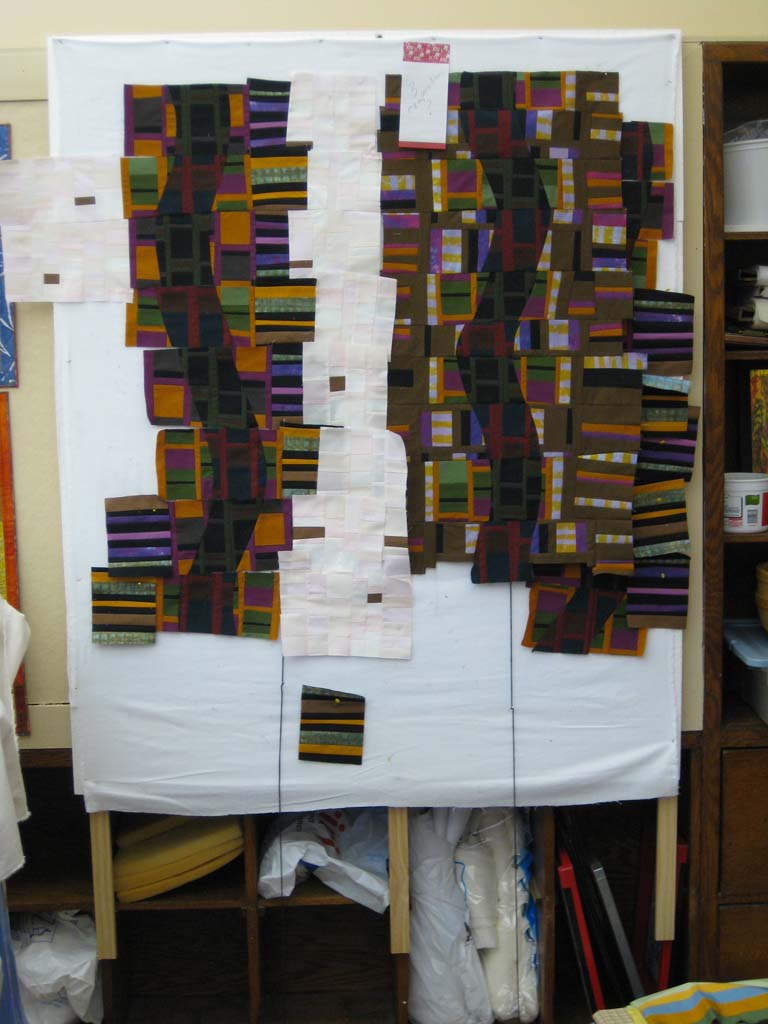
Saving the hopeless quilt: Part 1

Back in October I returned from two weeks of workshops in a sort of mixed up mood. One week produced some good samples and good ideas, the majority of which I've yet to explore. The other week produced bits and scraps of a failed design that quite frankly were just a nagging reminder of something that didn't quite turn out as expected. They can't all be home runs, right? Sometimes teacher, student, and the planets just don't align the right way at the right time. Learn what you can, remember the love, try to forget the angst, and move on.

So, moving on...
I've dug in my heels and I'm determined to make a difficult experience into something positive. The next few posts will show where I started with that failed design and where it's going.
The original composition started with strip sets, like the ones shown below.
We were given an assignment to create a strip quilt by restructuring these strip sets--really a very basic task. I got thoroughly bogged down in a the linear design and the "strips" and just couldn't seem to resolve any of the obvious design problems; like the fact that it's a BAD design. (You can read more about the experience in earlier posts).
I liked some of the restructuring that I'd done with the strip sets, but knew that the only way for me to get a fresh start with this quilt was to start breaking up some of those straight lines. Knowing that I had nothing to lose, I cut the long restructured sets into smaller pieces and started combining them with curved piecing.
That was interesting, but not enough on it's own to create much of an engaging design. The next step was to cut up and recombine these sets. Now things started getting interesting.
I hope that's enough of a teaser to get you to come back and see what happened next. I should have another post in a few days.
Read More