Thoughts & news
All set for the Greenbelt Art+Craft fair
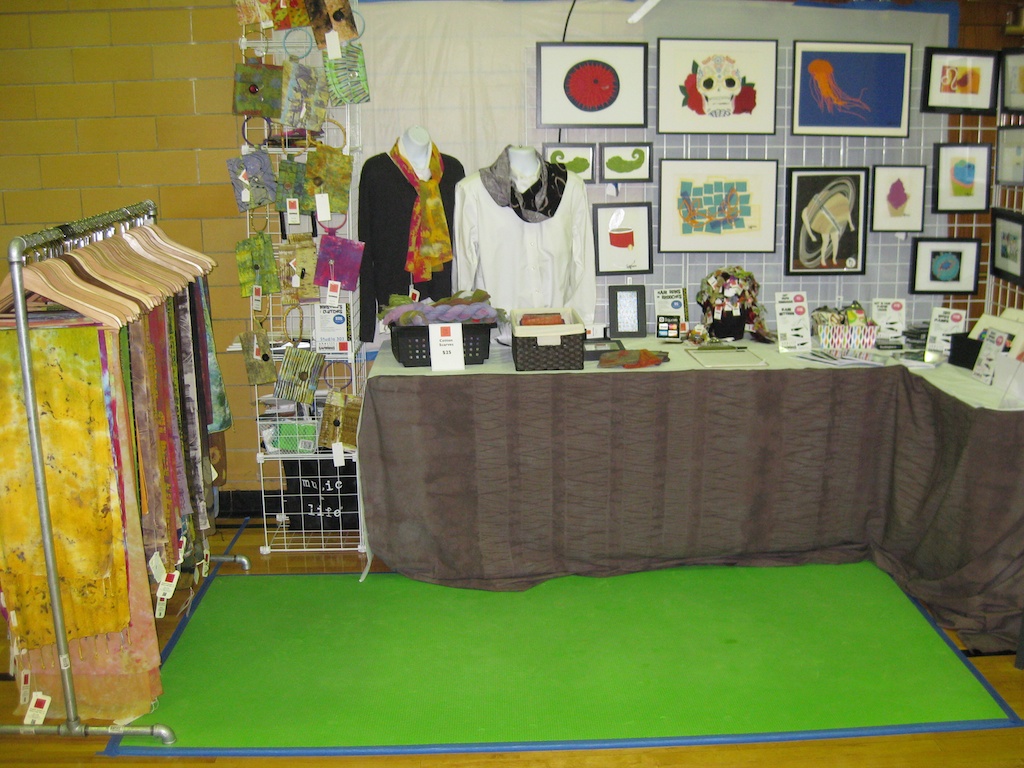
Sherill and I are all setup for the Greenbelt Festival of Lights Art + Craft Fair. For a first attempt booth I'm very pleased. As it worked out it's pretty much exactly a 50/50 mix of her work and mine. The framed work on the wall is Sherill's cut paper--just fantastic stuff. She's also got books and other paper work. She also make small purses and other things out of some my hand dyed and printed cloth from my scrap pile. I'll have to post some more detailed pictures of them. I wasn't sure what to expect, but they are terrific and absolutely cool. For my part is just miles of scarves--miles. I've very happy with the result of my recent work and I'm hoping for a good show.
Now I just need a drink, a little snack, and someplace to park my rear for a little while before bed. It'll be an early start tomorrow.
My new Etsy store is live
My new online store on Etsy went live quietly last week and I've been adding to it ever sense. I just announced it for the first time yesterday and I'm happy to say I've made my first sale. Frankly, this is way more effort that I expected it to be, but it's worth it because I didn't have to do any of the programming work. That's a fair trade, even with the listing costs.
Stop by and take a look at etsy.com/shop/russlittlefiberart.
Getting ready
I feel like I'm getting ready for so many things. That might or might not be a good thing. I think sometimes I use "getting ready"-- the act of collecting, gathering, studying -- as an excuse for not starting. Lately, however, I find myself getting ready for things that are going to happen no matter what. I spent 2 full days this weekend printing, dyeing, and discharging cloth because I'm getting ready for my first craft show, which is coming up in December. I'm also getting ready for the Art Cloth Network meeting later this week in St. Petersburg, FL. That means packing, but also finishing the Treasurer's report, collecting cloth to bring, and finishing my presentation. None of these things is truly monumental, but collectively...well let's just say that I've been busy.
No pictures of new art tonight, but there's plenty on the way and I hope to share some pictures of work in progress over the next several weeks.
On Point added to the "What Remains" show
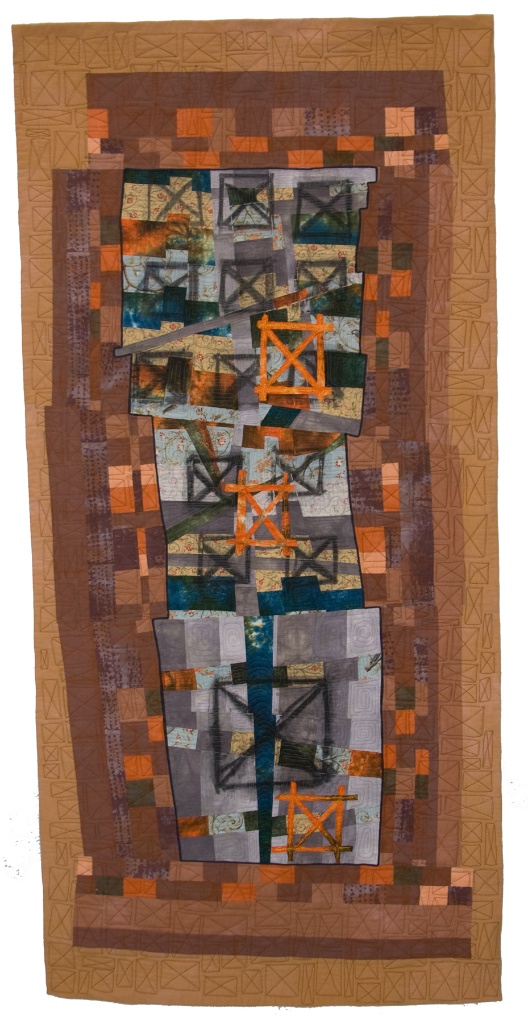
We had a wonderful artists reception this past Sunday for "What Remains." The turnout was good and everyone seemed very interested in the work. It was also nice to get to talk to some of my fellow artists in residence for a little while. Even though we all have studios in the same general space, our schedules are different and, to be honest, when we're there we're working. Many of us hardly see each other. Because Sunday was originally supposed to be the end of the run for the show (before it got extended), a couple people had work that was already promised to buyers or other shows. That left us with a couple of holes. Lucky me. I was able to add my quilt "On Point" to the show. It's never been shown before and I'm very happy for it to get a wider public viewing.
I think it's particularly appropriate for this show because, in addition to my own hand dyed cloth, it includes "remains" of commercial cloth that I used to make things that I wore around the house while recovering from surgery a couple years ago.
Finally finished: Part 4
OK. This is the last of the series of finally completed work, but I promise that there's more to come. These two pieces are called, "Sedona #1" and "Sedona #2". They're the first installments in a little mini-series inspired by a few days spent hiking in Sedona, Arizona earlier this summer. They each measure 30" w X 72" h. They're art cloth (cotton broadcloth) with a rod pocket at the top. They incorporate painting with thickened dye, low water immersion dyeing, soy wax resist, bound and stitched resist, and discharge with both chlorine and thiox.
Finally finished: Part 3
But wait, there's more. This one is called "Restructured Circles #2," which of course means it's another member of my "Restructured Circles" series. I have to say that I really love this piece. It's not heavily pieces, but it didn't need to be. It started out, as all of the pieces in this series will, as a whole cloth. It was then cut up and reassembled. In this case nothing happened to it after the reassembly other than quilting. The quilting is closely spaced echos following the general shape of the circular forms.
I'm pleased with the line quality and the feeling of the brush strokes, some of which I applied directly to the cloth and others indirectly through a silk screen. I also got where I wanted to be in terms of value and balance.
Finally finished: Part 2
This is the next installment in the series of recently finished work. It's called "Restructured Circles #1." I'm not sure that's the most evocative name, but it's part of a series by that name. I'm happy with both the concept and the result, and I'm looking forward to continuing this series for awhile.
The quilting is equally spaced parallel lines with a few lines intersecting at obtuse angles in the lower left. I used a mixture of variegated and light solid colored thread to create a visual variation in the quilting.
Finally finished: Part 1
This is the first of several posts showing newly finished work. This one is called "Line and Rhythm." I finished the quilt top probably two years ago, but have only recently completed the quilting. Like several recent pieces, the quilting here is very dense, about 1/4" spacing. I love the texture it creates.
I like this piece very much and have yet to make anything quite like it. I hope to get back to this sometime to use it as a starting point for a series. Actually, I can say that about several of pieces. Getting them photographed and getting some distance is allowing me to to see better what's working and what's not and to think about how individual pieces can inspire future work. Yes, of course, I know that I'm supposed to do that along the way--and I do take photos of work in progress. But, sometimes it seems that only at the very end--and sometimes only ofter considerable time has past--can I see the connection between one piece and something to follow.
UPDATED 9/21: In response to Judy's request, here's a detail shot of as well. Forgive the color balance and quality. It's an iPhone quickie.
By the time that I quilted this piece I'd switched to Aurifil 50 weight Mako cotton thread for quilting and I just love it. I was using Gutermann before. It's not bad thread per se, but the Aurifil is just so very superior. It's wonderfully fine. It feeds beautifully through the machine and there's virtually no lint (except of course from the batting). There's no local source around here that I know of so I've been mail ordering from Red Rock Threads in Nevada (redrockrockthreads.com).
Home By Another Way
The biennial Greenbelt Community Center Artists-in-Residence show, "What Remains" opened in the first floor gallery on Aug 26 and runs through Oct 2. If you're local to the the DC Metro area do try to see this show. I think the work is particularly strong. I'm grateful to Greenbelt for the support they provide to me and my fellow artists.
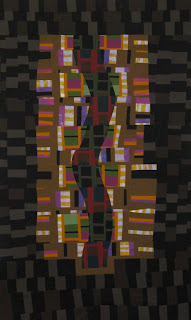
"Home By Another Way," which I've worked on for more of this year than I'm going to admit (too many distractions), is my interpretation of the show's theme, "What Remains." This piece literally grew from the remains of a failed composition. It taught me a lot and I'm happy with the final work.
The three panels of the triptych measure about 6 feet across in total.
Dyeing to Discharge: Workshop samples
Clamped resist on white fabric dyed black.
Dyeing to Discharge: Day 5
Well, actually this post is more like post-day 5. I'm home in College Park and exhausted. I can't figure out what I did to be so pooped except that I must have worked harder this week than I thought.
- First and foremost: I've been ignoring a really valuable design tool--discharge--because I was squeamish about the safety, mess, etc. After a week of working with this stuff and never feeling any ill effects I feel well prepared to do more discharge work, and to do it in a way that's safe.
- Tied for first: This stuff is great, but anyone using any form of bleach or reducing agent needs to wear a respirator when using it and work outside. [That goes for using Tilex in the bathroom too. Close the door, open the window, turn on the fan, wear an acid/gas respirator, leave the room when you're done, and don't come back until the smell is gone. Don't laugh. I'm totally serious. I've made myself sick in the past from chlorine and I will never do it again.]
- I'm going to try a few more experiments with MX primary combinations and work on developing a vocabulary of discharge colors, effects, and marks that speaks to me. In a lot of ways workshops like this one are like going to a wine tasting. You taste some things you like and some you don't, and after a while your palette needs a rest to recover from the over-stimulation.
- MX acid process for silk! I've got to do more of this. I've got all of the supplies; I just need to fine tune my technique. [Of course Carol teaches a 5-day action packed class just on silk, but I can't think about that now. Too tired.]
- I want to work on black and white textures through discharge. Is it really possible that there's a pleasing combination of MX primaries out there that discharges to white? It doesn't seem that way, but...
- I'm going to experiment with potato dextrin as a resist and see if I can use it in a way that works for me. I'm not really interested in slathering yardage and waiting for it to crackle, but the stuff washes out so much easier than some other resists that it's worth playing with.
- Finally, I bought some monagum [the giant PRO Chem order should arrive on Wed] and I'm going to make my own thickened bleach discharge paste from now on. No more dishwasher gel.
Bottom line: I learned some new things and a lot of good safety tips. I definitely recommend this workshop for anyone interested in working with discharge techniques. Yes, you can figure this stuff out on your own, but this is a great way to jumpstart the process and get a good and SAFE start.
Dyeing to Discharge: Day 4
Yesterday was the 4th day of class. Time is flying by--faster than usual. The sample books are all done and it will be a valuable reference. As I was replaying the day in my head last night I started thinking about the work hanging on my design wall at home. One of the things that I wanted to accomplish this week was to work on new ideas for how I would add complexity to that composition through discharge. I've got some ideas, so mission accomplished.
Dyeing to Discharge: Day 3
I've only got time for a quick post, then I need to get to sleep. Day 3 was good. Today we wrapped up the exploration of chlorine bleach with some work with thickened bleach using Monagum. I discharged a piece of rayon that I prepared yesterday with potato dextrin crackle. I don't think I need to do that again. It's just a big mess. Yes, it does create an interesting pattern, but one that is very distinctive--as in, "Oh look he used potato dextrin." Someone observed that while it might be obvious to other surface designers, there's a whole world of folks out there who find the crackle pattern very engaging. It just doesn't speak to me.
We also did a bit of work with thickened thiox. Now, I've done this before and always found the smell a bit overwhelming. Today we all were able to screen, print, paint, etc. indoors with no ill effects. Of course the ironing to activate the discharge was all done outside with respirators on.
After dinner this evening I spent a couple of hours stitching up a T-shirt and a piece of silk for a bit of stitched shibori tomorrow.
Learning lots and still having fun. Pictures tomorrow.
Dyeing to Discharge: Day 2
Another good day, but that's not really a surprise. I think I could actually take this class at a faster pace, but the group is a mixture of folks who have previously studied with Carol and some who haven't. Everyone has had some MX experience, so that's helping move things along.
Dyeing to Discharge: Day 1
It was a good day. We spent a while talking about some general concepts concerning discharge, but the real thrust of the day was making the first round of samples. We dyed samples of all of the pure MX dyes and all of the PRO Chem blacks on both silk and cotton, then discharged those along with some commercial black samples with thiox, chlorox, and deColourant (that new stuff that everyone's so excited about). I've done little tests before--a dab of bleach on the edge of a piece of cloth to predict what I might get before embarking on a broader application. But, I've never done so many samples at a time or with such a broad range of colors. It's amazing to see all of the possibilities. Tomorrow everything gets assembled into a sample book, which we'll use to make design decisions for the rest of the week.
A week in Fall River
I'm in Fall River at PRO Chemical for a 1-week workshop with Carol Soderlund called "Dyeing to Discharge." It's hard to believe, but this will be my 5th class with Carol. I'm going to have to ask for a degree soon.
"Unexpected Patterns" opens today
"Unexpected Patterns" (aka "Unexpected Patterns: Quake!") opens today at the Worcester Center for Crafts in Worcester, MA. If you're in the area check out my piece in this show along with the other outstanding work by members of the Art Cloth Network.
Saving the hopeless quilt: Part 4
As I began to assemble it I realized that the little piece of the curved middle strip that was extending below the rest of the design was something to which I'd become attached. From the purely practical perspective of construction, this was not the best time to come to this realization because it meant even more seam ripping than I was already doing, not to mention scavenging through the scrap pile in search of bits of fabric that I was out of.

Saving the hopeless quilt: Part 3
Saving the hopeless quilt: Part 2
Picking up where I left off with the last post...
